Growing Sweet Potatoes
Sweet potatoes are grown more often in southern regions because they require at least four months of warm temperatures, though there are varieties that will grow in northern gardens, too. They are surprisingly easy to grow and just a few plants can produce a generous harvest. Here’s how to plant, grow, and harvest delicious sweet potatoes in your garden.
In warm climates, many gardeners plant sweet potatoes about a month after the last spring frost, when both the air and soil are dependably warm. There are bush types and vining types.
Sweet potatoes aren’t started by seed like most other vegetables, they’re started from slips—small rooted pieces of tuber which are sliced right off the sweet potato.
Not only are sweet potatoes very easy to grow, they are also drought- and heat-tolerant, and have few pests or diseases. The sweet potato is very nutritious and relatively low in calories.
Planting
How to plant sweet potatoes
- Sweet potatoes are typically grown from slips, which are sprouts that are grown from stored sweet potatoes. You can buy slips from garden centers, nurseries, or local farmers.
- You can also create your own slips to plant in the spring. In November (this is when the best of the new harvest will be out), go to your supermarket and look for unblemished and uncracked medium-size sweet potatoes. One sweet potato should yield about 12 plants.
- Store sweet potato slips in a well-lit room with a temperature between 65° and 70°F. Keep them there until about 90 days before the last spring frost date. They will then need to be embedded in soil for 90 days and kept continuously warm and moist.
- Use a 1-½ gallon pot for every two slips. Remember to poke drainage holes in the bottom of the pot and fill it with 3 inches of mulch, followed by garden or potting soil. Plant the slips in the pot at a 45° angle so that the sprouts will grow above the soil. When the slips are 6 to 12 inches tall, you can plant them outdoors, as long as all danger of frost has passed.
- After you have grown your own slips or bought them, till the area of the garden you will be using to a depth of 8 to 10 inches. Create raised mounds 6 to 8 inches tall and about 12 inches wide. Use fertile, well-drained soil.
- Plant the slips 12 to 18 inches apart in the bed, after the last spring frost date. Plant the slips deep enough to cover the roots and about ½ inch of the stem. Water the slips with a starter solution (a liquid fertilizer) that is high in phosphorous, then water generously for a few days to make sure that the plants root well.
Care
How to grow sweet potatoes
- Side-dress the potatoes 3 to 4 weeks after transplanting with 3 pounds of 5-10-10 fertilizer per 100 feet of row. If you have sandy soil, use 5 pounds.
- Hoe the beds occasionally to keep weeds down. Remember to reshape the beds with soil or mulch.
- For good harvests, do not prune the vines, because they should be vigorous.
- Remember to keep the plants watered. Deep watering in hot, dry periods will help to increase yields, although if you are planning to store some of the potatoes, do not give the plants extra water late in the season, as it could cause cracking of the tuber’s skin.
Pests/Diseases
- Flea beetles
- Sweet potato scurf
- White blister
- Fungal leaf diseases (Alternaria leaf spot and blight, Botrytis)
- Stem rot
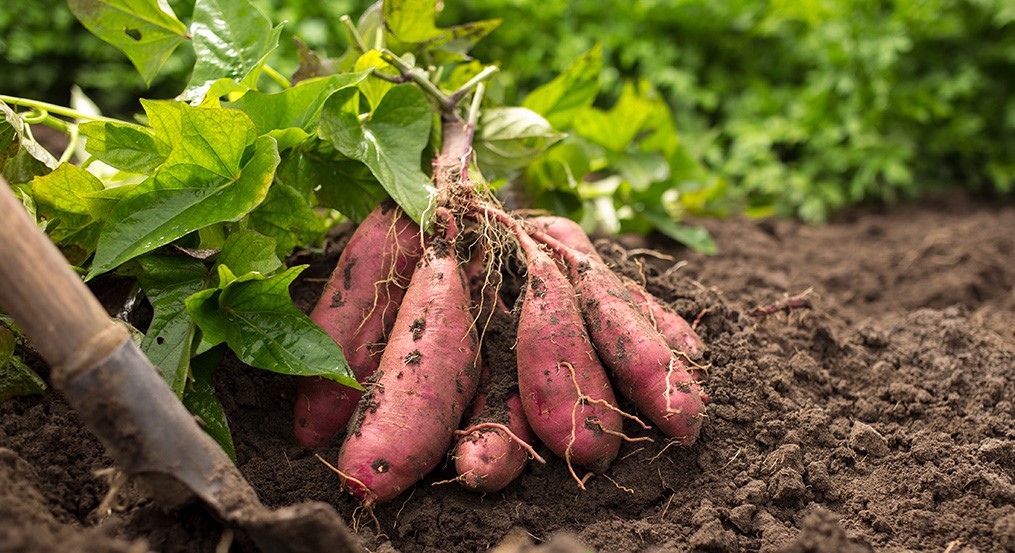
Harvest/Storage
How to harvest sweet potatoes
- You can start digging up the potatoes as soon as they are big enough for a meal. Often, this is 3 to 4 months from when you planted the slips (most varieties take at least 100 days to reach maturity).
- Usually, sweet potatoes are ready to harvest when the leaves and ends of the vines have started turning yellow, but you can leave them in the ground up until the fall frost.
- Since the roots spread 4 to 6 inches deep in the soil, a spade fork is useful when digging up the potatoes. Loosen the soil around the plant (18-inch diameter) so you do not injure the tubers. It’s fine to cut some of the vines away.
- Pull up the primary crown of the plant and use your hands to dig up the tubers. Handle the sweet potatoes carefully, as they bruise easily.
- After digging up the tubers, shake off any excess dirt, but do not wash the roots.
- You must cure sweet potatoes or they will not have that delicious, sweet taste. Curing the potatoes allows a second skin to form over scratches and bruises that occur when digging up the potatoes. To cure, keep the roots in a warm place (about 80°F/27°C) at high humidity (about 90%) for 10 to 14 days. A table outside in a shady spot works well. For best curing, make sure that the potatoes are not touching one another.
- After curing, throw out any bruised potatoes, and then wrap each one in newspaper and pack them carefully in a wooden box or basket. Store the sweet potatoes in a root cellar, basement, or other place with a temperature of at least 55°F/13°C.
- If stored at a temperature range of 55–60°F (13–15.5°C) with high humidity, the tubers should last for about 6 months. When removing the potatoes from storage, remember to be gentle; do not dig around or else you will bruise the potatoes.
Recommended Varieties
- ‘Centennial’ is one of the most popular types of sweet potato. It is carrot-colored and has a good storage life. It is also a good producer for northern growers.
- ‘Beauregard’ originally comes from Louisiana, but grows well in the north, too. It has light purple skin and dark orange flesh.
- ‘Jewel’ is copper-colored and has good disease resistance. It also has a good storage life.
- ‘Bunch Porto Rico’ is a good choice for gardens with limited space. It is copper-colored and very flavorful.
- ‘Stokes’ offers a vibrant purple color and is full of extra health benefits.
- ‘Vardaman’, another good choice for gardeners with limited space, is a bush-type variety with golden skin and orange flesh.
Website: www.almanac.comhttps