Growing Aloe Vera
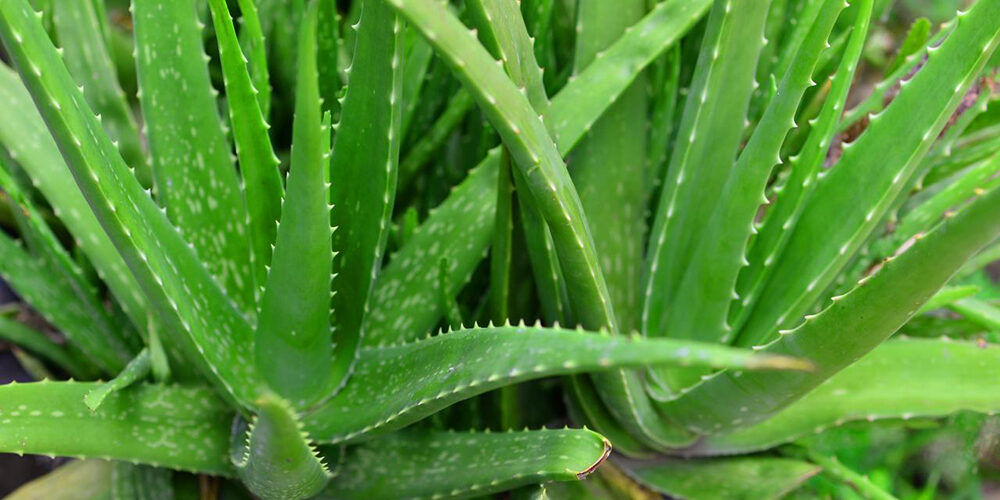
The aloe vera plant is an easy, attractive succulent that makes for a great indoor companion. Aloe vera plants are useful, too, as the juice from their leaves can be used to relieve pain from scrapes and burns when applied topically. Here’s how to grow and care for aloe vera plants in your home!
Before you buy an aloe, note that you’ll need a location that offers bright, indirect sunlight (or, artificial sunlight). However, the plant doesn’t appreciate sustained direct sunlight, as this tends to dry out the plant too much and turn its leaves yellow.
Keep the aloe vera plant in a pot near a kitchen window for periodic use but avoid having the sun’s rays hit it directly.
Please note: The gel from aloe vera leaves can be used topically, but should not be ingested by people or pets. It can cause unpleasant symptoms such as nausea or indigestion and may even be toxic in larger quantities.
Planting
Before planting
- It’s important to chose the right type of planter. A pot made from terra-cotta or a similarly porous material is recommended, as it will allow the soil to dry thoroughly between waterings and will also be heavy enough to keep the plant from tipping over. A plastic or glazed pot may also be used, though these will hold more moisture.
- When choosing a container, be sure to pick one that has at least one drainage hole in the bottom. This is key, as the hole will allow excess water to drain out.
- Select a container that’s about as wide as it is deep. If your aloe plant has a stem, choose a container that is deep enough for you to plant the entire stem under the soil.
- Aloe vera plants are succulents, so use a well-draining potting mix, such as those made for cacti and succulents. Do not use soil. A good mix should contain perlite, lava rock, coarse sand, or all three. Aloe vera plants are hardy, but a lack of proper drainage can cause rot and wilting, which is easily the most common cause of death for this plant.
- A layer of gravel, clay balls, or any other “drainage” material in the bottom of the pot is not necessary. This only takes up space that the roots could otherwise be using. A drainage hole is drainage enough!
- (Optional) To encourage your aloe to put out new roots after planting, dust the stem of the plant with a rooting hormone powder. Rooting hormone can be found at a local garden center or hardware store, or online.
How to plant (or repot) an aloe vera plant
If your aloe plant has grown leggy, has gotten too large, or simply needs an upgrade, it’s time to repot it. Here’s how:
- Prepare your pot. After giving the new pot a quick rinse (or a good scrub, if it’s a pot you’ve used before) and letting it dry thoroughly, place a small piece of screen over the drainage hole; this will keep the soil from falling out the bottom and will allow water to drain properly. A doubled-up piece of paper towel or newspaper can also work in a pinch, though these will break down over time.
- Prepare your plant. Remove the aloe vera plant from its current pot and brush away any excess dirt from the roots, being careful not to damage the roots.
- If your plant has any pups, remove them now. (See the “Care” section of this page for instructions on removing and potting pups.)
- If your plant has a very long, spindly stem that won’t fit in the pot, it is possible to trim the stem off partially. Note that this is risky and could kill the plant. To trim the stem: Cut off part of the stem, leaving as much as possible on the plant. Next, take the bare plant and place it in a warm area that gets indirect light. After several days, a callous will form over the wound.
- Plant your plant. Fill the pot about a third of the way with a well-draining potting mix, then place your plant in the soil. Continue filling in soil around the plant, bearing in mind that you should leave at least ¾ of an inch of space between the top of the soil and the rim of the pot. The bottom leaves of the aloe plant should rest just above the soil, too. Do not water after planting.
- Ignore your plant (temporarily). After you’ve placed your aloe in its new pot, don’t water it for at least a week. This will decrease the chance of inducing rot and give the plant time to put out new roots. Until the plant seems to be rooted and happy, keep it in a warm place that receives bright but indirect light.
Care
How to take care for an aloe vera plant
- Place in bright, indirect sunlight or artificial light. A western or southern window is ideal. Aloe that are kept in low light often grow leggy.
- Aloe vera do best in temperatures between 55 and 80°F (13 and 27°C). The temperatures of most homes and apartment are ideal.
From May to September, you can bring your plant outdoors without any problems, but do bring it back inside in the evening if nights are cold. - Water aloe vera plants deeply, but infrequently. To discourage rot, allow the soil to dry at least 1 to 2 inches deep between waterings. Don’t let your plant sit in water.
- Water about every 3 weeks and even more sparingly during the winter. Use your finger to test dryness before watering. If the potting mix stays wet, the plants’ roots can begin to rot.
- Fertilize sparingly (no more than once a month), and only in the spring and summer with a balanced houseplant formula mixed at ½ strength.
Removing and replanting aloe vera offsets (pups)
Mature aloe vera plants often produce offsets—also known as plantlets, pups, or “babies”—that can be removed to produce an entirely new plant (a clone of the mother plant, technically).
- Find where the offsets are attached to the mother plant and separate them using pruning shears, scissors, or a sharp knife. Leave at least an inch of stem on the offset.
- Allow the offsets to sit out of soil for several days; this lets the offset form a callous over the cut, which helps to protect it from rot. Keep the offsets in a warm location with indirect light during this time.
- Once the offsets have formed callouses, pot them in a standard succulent potting mix. The soil should be well-draining.
- Put the newly-potted pups in a sunny location. Wait at least a week to water and keep the soil on the dry side.
How to get an aloe to flower
Mature aloe vera plants occasionally produce a tall flower spike—called an inflorescence—from which dozens of tubular yellow or red blossoms appear. This certainly adds another level of interest to the already lovely aloe!
Unfortunately, a bloom is rarely achievable with aloes that are kept as houseplants, since the plant requires nearly ideal conditions to produce flowers: lots of light, sufficient water, and the right temperature range. Due to these requirements (mainly lighting), aloe flowers are usually only seen on plants grown outdoors year-round in warm climates.
To give your aloe the best shot at flowering:
- Provide it with as much light as possible, especially during spring and summer. Aloes can be kept outdoors in full sun during the summer, when temperatures are above 70°F (21°C). If nighttime temps threaten to drop below 60°F (16°C), bring the aloe inside.
- Make sure the plant is getting the right amount of water—enough to keep it from drying out completely, but not enough to drown it! If the plant’s being kept outdoors, make sure that it’s not getting consistently soaked by summer rains.
- Give your aloe a proper dormancy period in the fall and winter. Aloe tend to bloom in late winter or early spring, so giving them a period of rest consisting of less frequent watering and cooler temperatures may encourage them to flower.
- Don’t be surprised if it still doesn’t flower. Despite our best efforts, indoor conditions just aren’t ideal for most aloes, so don’t be surprised if yours simply refuses to bloom!
Pests/Diseases
Aloe vera plants are most susceptible to the usual indoor plant pests, such as mealybugs and scale.
Common diseases include:
- Root rot
- Soft rot
- Fungal stem rot
- Leaf rot
Avoid overwatering to keep these conditions from developing or worsening.
Harvest/Storage
Aloe vera gel
To make use of the aloe vera plant’s soothing properties, remove a mature leaf from the plant and cut it lengthwise. Squeeze the gel out of the leaf and apply it to your burn, or simply lay the opened leaf gel-side–down on top of the affected area.
Do not ingest the gel, as it can cause nausea and other unpleasant symptoms.
Recommended Varieties
Especially attractive Aloe include:
- Tiger or Partridge-Breasted Aloe (Aloe variegata) – A compact aloe characterized by short, smooth leaves with uneven white stripes.
- Lace Aloe (Aloe aristata) – A small plant with white-spotted, finely sawtoothed leaves.
- Blue Aloe (Aloe glauca) – A larger aloe species with silver-blue leaves.
Website: www.almanac.com