Growing Irises
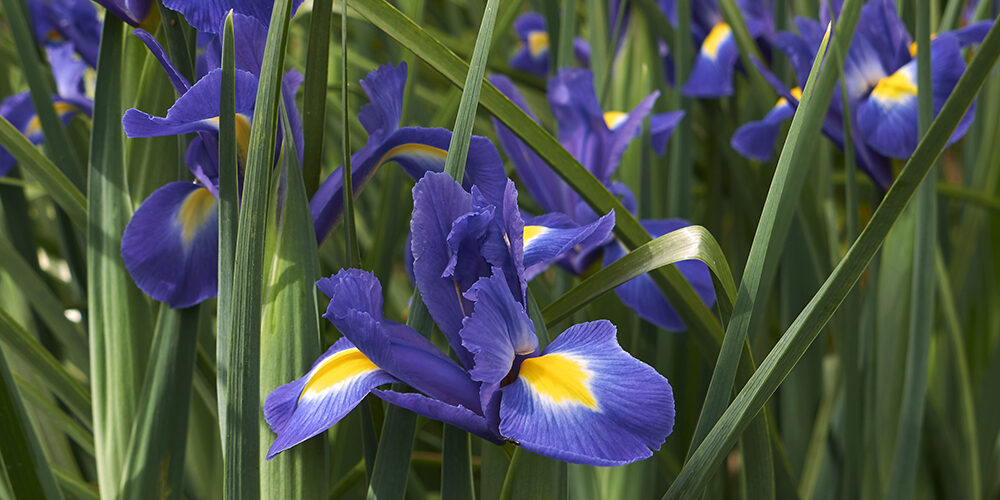
The tall, beautiful iris, named after the Greek goddess who rode rainbows, comes in many magical colors. Despite its divine origins, this June bloomer is rugged, reliable, and easy to grow. Learn all about planting, growing, and caring for iris flowers.
There are some 300 species in the genus Iris. The most familiar irises are the tall (at least 28 inches) bearded irises (Iris germanica).
These distinctive six-petaled flowers have three outer hanging petals (called “falls”) and three inner upright petals (called “standards”).
Irises may be a “bearded” type or crested (beardless). Bearded iris are so-called because they have soft hairs along the center of the falls. In crested iris, the hairs form a comb or ridge.
Most irises flower in early summer. Some—mostly bearded hybrids—are remontant, flowering again later in the summer.
Irises attract butterflies and hummingbirds, and make lovely cut flowers. For iris companions in the garden, look to roses, peonies, and lilies.
Planting
When to plant Irises
- Plant irises in mid- to late summer (July to September/October) when nighttime temperatures remain between 40 and 50 degrees Fahrenheit or above. This gives them plenty of time to get established before the coming winter. The tall bearded irises are best planted closer to the fall because they go dormant in June.
- If you receive bare rhizomes or irises in a container at some point earlier in the year, go ahead and plant them as soon as convenient. It’s better to get them in the ground rather than wait until the ideal time.
Choosing and preparing a planting site
- Irises will bloom best in full sun. They can tolerate as little as half a day of sun, but it’s not ideal. Without enough light, they won’t bloom.
- Bearded irises must not be shaded out by other plants; many do best in a special bed on their own.
- They prefer fertile, neutral to slightly acidic soil. Learn more about preparing soil for planting and organic soil amendments.
- Good drainage all year-long is very important; irises prefer “wet feet, but dry knees.” They will not tolerate wet soil in wintertime.
- Loosen the soil with a tiller or garden fork to a depth of 12 to 15 inches, then mix in a 2- to 4-inch layer of compost.
How to plant Irises
- For bare-root irises, plant the rhizome horizontally with the top exposed. In climates with hot summers, plant the rhizome just below the soil surface.
- Plant rhizomes singly or in groups of three, 1 to 2 feet apart, depending on the size.
- Dig a shallow hole 10 inches in diameter and 4 inches deep. Make a ridge of soil down the middle and place the rhizome on the ridge, spreading roots down both sides. Fill the hole with soil and firm it gently, leaving part of the rhizome and the foliage uncovered.
- Tip: It’s easy to make the mistake of planting irises too deeply. The rhizomes of these plants should be partially exposed to the elements, or thinly covered with soil in hot climates. If they’re buried too deeply, they won’t do well.
- Do not mulch around the rhizome as this practice may encourage rot.
- Water thoroughly.
Care
How to grow Irises
- Fertilize in early spring with an all-purpose fertilizer scratched in around the plants. Avoid applying high-nitrogen fertilizers to the surface or carelessly mulching with organic matter, which may encourage rhizome rot. Reblooming Irises perform best if fertilized again after the first wave of flowering is finished.
- Do not overwater irises; too much moisture in the soil can cause the rhizomes (roots) to rot. Water consistently and deeply, especially during summer drought.
- Keep rhizomes exposed. Unlike bulbs, which thrive deep underground, iris rhizomes need a bit of sun and air to dry them out. If they’re covered with soil or crowded by other plants, they’ll rot. Irises may benefit from shallow mulching in the spring.
- Taller irises may need staking or they will fall over.
- Watch for iris borers in the foliage (dark vertical lines that may appear watery show up in the leaves).
- Deadhead (remove spent blooms) consistently; Bearded Irises will flower sequentially on buds spaced along the stems.
- After blooming is finished, cut flower stems down at their base.
- But do NOT trim iris leaves after they have finished blooming. Leaves carry on photosynthesis for next year’s growth. Cut off brown tips—and cut the flowering stalk down to the rhizome to discourage rot.
- After hard frost in the fall, cut foliage back hard, remove any foliage that appears spotted or yellowed and dispose of all debris in the trash.
- If iris foliage is hit with heavy frost, remove and destroy it to eliminate borer eggs. See your local frost dates.
- For winter protection, cover the rhizomes with an inch or two of sand topped with a light layer of evergreen boughs, applied after the ground freezes and removed when the Forsythias bloom the following spring.
- In the early spring, remove winter mulch and any old foliage to allow for fresh, new growth and prevent Iris borers.
Dividing Irises
Over time, it’s not unusual for plantings of iris to become overcrowded, which causes the rhizomes to lose vitality and stop blooming. When this happens (usually every 2 to 5 years), it’s time to divide and replant healthy rhizomes in fresh soil.
When to divide? Do this task after flowering finishes and then trim the foliage back to six inches.
- Shortly after blooming (mid-summer), carefully dig up the clump of irises. You’ll find that the original rhizome that you planted (the “mother”) has produced several offshoot rhizomes.
- Separate these rhizomes from the mother with a sharp knife and discard of the mother, as it will no longer produce blooms.
- Inspect the rhizomes for any rotting tissue or other signs of disease, removing and discarding infected parts or entire unhealthy rhizomes.
- Trim the iris foliage down to 3 to 5 inches in height so that the plants can focus on establishing new roots.
- Plant these fresh rhizomes in a new bed, replant them where they were before (after adding new soil), or share them with friends and spread the joy of irises!
Pests/Diseases
- Irises are deer-resistant and drought-tolerant.
- However, they are susceptible to the horrible Iris Borer which overwinters as eggs in spent leaves. If you see vertical streaks in the leaves, then look for these pests and squash them! If you see signs of rot in the rhizome, dig it up and remove the affected parts.
- Verbena bud moth, whiteflies, iris weevil, thrips, slugs and snails, aphids, and nematodes may also be troublesome.
Recommended varieties
- The Tall Bearded Iris varieties come in flamboyant colors which lively up the June garden. They are June bloomers and generally planted only in the fall.
- ‘Immortality’ is a tall bearded Reblooming Iris which flowers in June and then offers a second crop of pristine white flowers in late summer. It’s hardy to Zone 4.
- Other rebloomers, hardy at least to Zone 4, are: ‘Feed Back’, a dark purple; ‘Earl of Essex’, also purple; and ‘I Do’, with white flowers.
- If you live in Zone 5 or warmer, try ‘Jennifer Rebecca’, a mauve pink beauty.
- Siberian Irises, I. sibiricaalso, also comes in a range of colors. They have a delicate beauty than the stately beared irises but are equally rugged.
- The Japanese Iris, I. ensata, has huge, flat blooms that resemble tropical birds and they thrive around ponds.
Website: www.almanac.com