DIY Indoor Clay Pots
We will show you how to make these indoor clay pots, perfect for growing plants in small spaces.
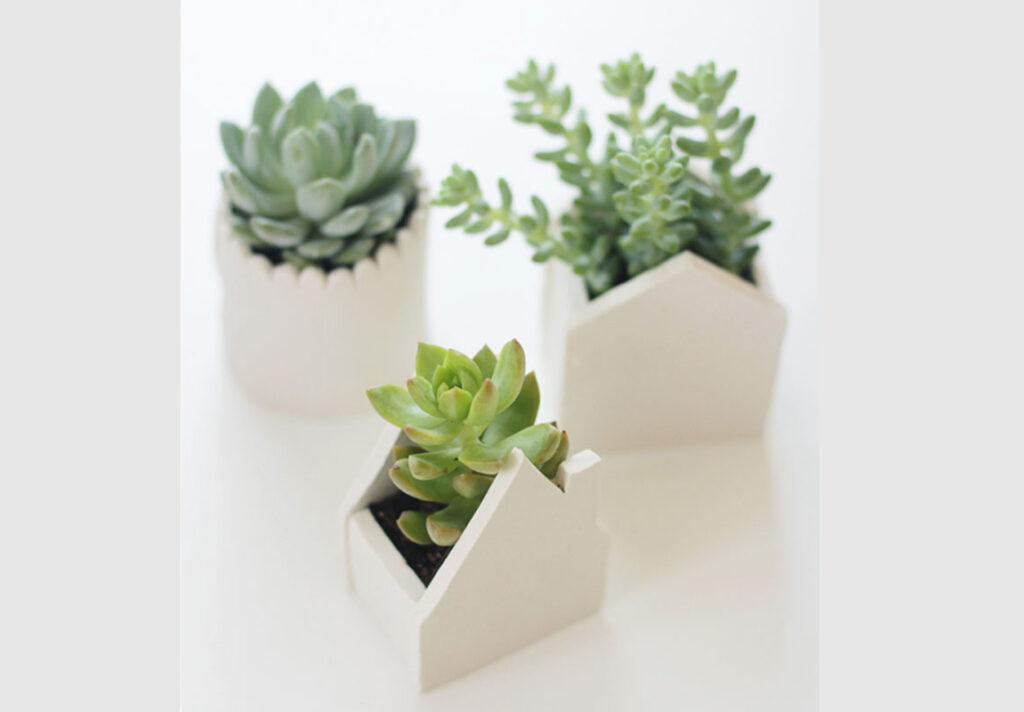
This is great way to spend some quality time with your kid and make interesting clay pots. Perfect vessel to house a mini plant as a pretty and thoughtful gift. You can also see how to make different wooden plant stands.
What you need
- Knife
- Oven-bake clay
- Rolling pin
- Non-stick baking paper
- Ruler (optional)
- House template printed and cut out (optional).
Instructions
Step 1
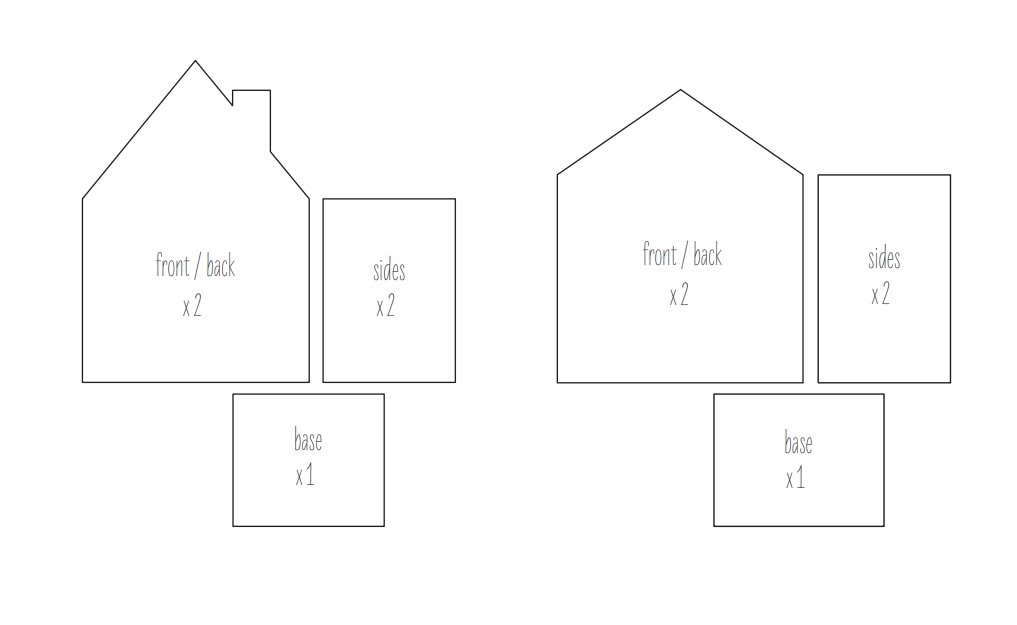
Make house template, or any other you like. Draw base and sides the way you want them to look.
Step 2
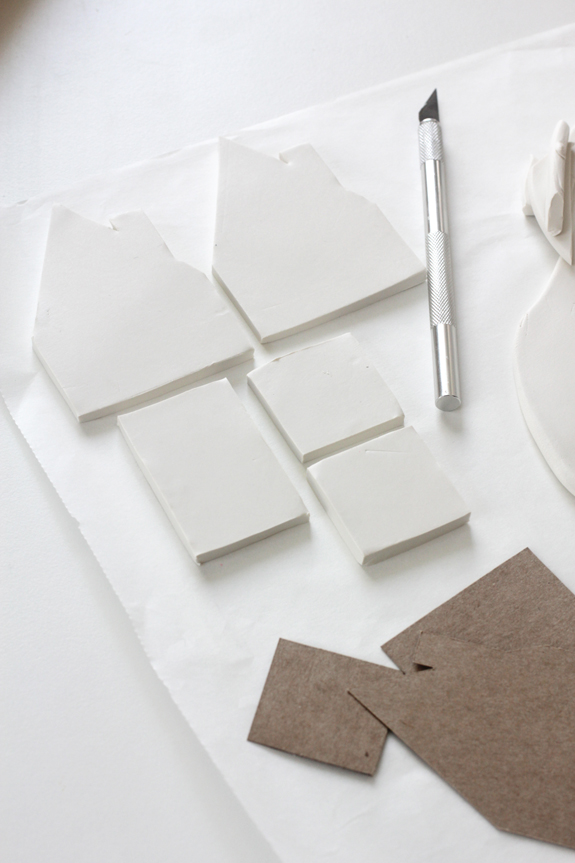
Roll out your oven-bake clay on a piece of baking paper until it’s approximately approx. 1/8″ thick or a bit more.
Step 3
Put a house template onto cardboard and cut around it. Lay the pieces onto the clay and use the knife to carefully cut around the shapes.
Step 4
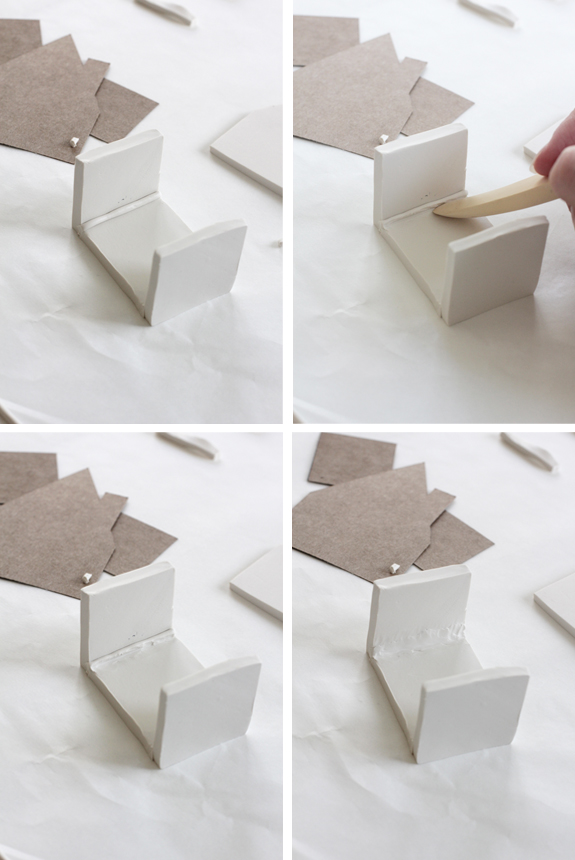
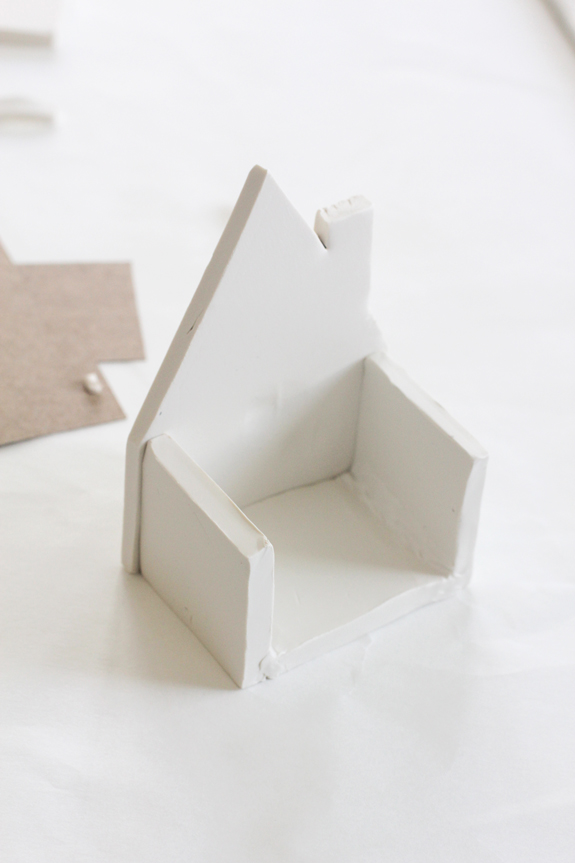 Once you have all the pieces cut out, take the base piece and press the two side pieces onto the ends. We want to make the pot watertight, so take a small piece of extra clay and roll it into a fairly thin snake shape. Place the ‘snake’ on the inside join (where the side meets the base). Using the smoothing tool, squash part of the ‘snake’ into the base of the pot and smooth it out. Then do the same to the top of the ‘snake’. I’ve tried to demonstrate in the photos above. Do the same to both sides.
Step 5
Once both inside joins are sealed, carefully turn the pot over and smooth over the joins on the bottom of the pot.
Step 6
Add each side of the house to the base structure (one at a time), and using the same ‘snake’ technique, seal all the joins. Keep in mind, it will depend on how thick your pieces are as to whether you will have some overhang (ie. the base structure is slightly narrower than the house pieces). I designed mine to be this way, however you can make adjustments as you go until it looks how you like it.
Don’t forget to smooth out all the outside joins. As you’re smoothing out the joints, be sure to put one hand on the other side to where you’re working as support, so the clay isn’t warped/damaged from pushing on it.
Step 7
Once you’re sure that all the joins and cracks have been sealed, bake your pot using the instructions on the packet. Keep an eye on it in the oven to make sure that it’s keeping its shape.
Step 8
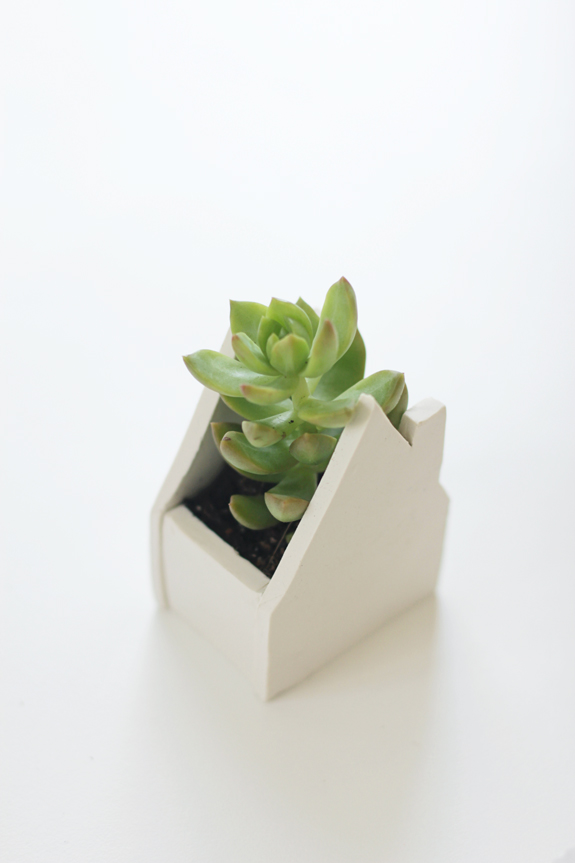
Once the pot is cooled, check that it’s sealed by filling it with water. Then go ahead and plant a cute little plant into your pot!
Website: www.gardenersworld.com