How to Make Concrete Planters

 These DIY concrete planters are simple to make in just a weekend and with materials you may already have around the house. They look modern with unique shapes that come straight from the recycling bin! Grab just a few supplies and let’s make concrete garden pots!
What you need
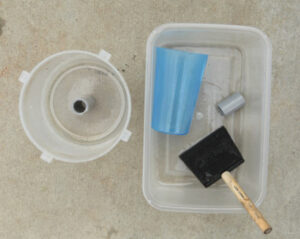
- Plastic containers to use as concrete molds—choose all sorts of shapes for the molds, but make sure that the plastic is strong enough to hold the shape of heavy concrete. If the sides of the container are too flimsy, they will warp and you will get some weirdly-shaped planters (although they may also turn out kind of fabulous!).
- Cooking oil
- Foam brush
- Fine concrete (topping or repair concrete)—standard concrete has gravel in it and these larger stones will affect the overall look of your DIY planters. Look for a smooth concrete made of sand and no large rocks, typically used to repair concrete or as a top coat for rough surfaces. As long as the planter isn’t huge, this will be the best concrete to choose.
- Trowel
- Rocks
- Instructions
- Drill
- Concrete drill bit
Instructions
Step 1

Thoroughly grease the containers with cooking oil so that the concrete doesn’t stick. I’ll write it again for emphasis: thoroughly. It can be tough to get the concrete out of the molds, so take some time and grease them up well. You will thank me later.
Step 2

Mix the concrete by following the instructions on the package. Scoop concrete into a large mold and set a second, smaller mold into the first one. Make sure that you grease both the outside and the inside of the smaller mold. You can fill the smaller one with more concrete and insert an even smaller mold in that one. Keep going until the planters get too small and fill the final one with some pebbles to weigh it down.
Step 3

Top up all of the planters with more concrete and tap them to remove bubbles. Smooth the surface so they even out.
Let the concrete planters dry for 24 hours. Unmold them by shaking the concrete loose, or cutting it away where it is too difficult to remove. It may take a bit of work, but if they were well oiled this is where you will thank me.
Step 4

I have used the same containers many times over now, so it is possible to get them out with some upside-down shaking.
Now, let the containers cure for another week or so to ensure that they are fully ready for drilling. Use a concrete drill bit to drill a hole into the bottom of the planter for drainage.
Plant them up with sedum or annuals and keep them well watered. Set them around the garden and enjoy!
How to add drainage
The PVC pipe requires measuring it and cutting it to the right height to go from the inside planter to the outside one. Oil it well and pour the concrete around it. You can certainly use this method or the drilling method that was described above for making drainage holes. Each has its merits and both require some finicky work. With the PVC pipe, you will inevitably be chipping at it (or drilling it!) to get the excess concrete out of the hole, so choose your method based on what you have on hand. To protect the wood, line the planter inside with plastic, fixing it with small nails. Make drainage holes before filling it with compost.
Website: gardentherapy.ca